Pages

Showing posts with label Holiday. Show all posts

Wednesday, October 24, 2007

Just When You Think You Are Sick of Pumpkin

Some endeavors, no matter how daunting they may seem, just cry out to be undertook. As soon as you hear about it you think "THIS I GOTTA DO!" Even though things could go wrong, and whatever it is you are attempting has caused peril for people you hold dear...the temptation far outweighs the risks. In my life this was true for various body piercings (which I no longer have), for the three tattoos I had, for that one time I went sky coasting

and for this past Saturday night when I made bread from SCRATCH for the first time.

And not just any bread - Pumpkin Walnut Focaccia with Gruyere.

Thanks to Cooking Light, I came across this little seasonally delightful recipe and could not get it out of my head. So what if my last attempt in bread making ended in the dough stage (and practically in tears I might add) when I dropped the horribly sticky ball onto the floor and it became so entangled with a dust bunny that their union could not be torn asunder?

(Yeah I need to sweep more. Whatevs)

This bread contains three things I love in life - Pumpkin, Nuts, and CHEESE!!!! Oh and carbs. Could it be any more perfect? Only if it somehow involved pesto and chocolate but that is an adventure for another time.

So let's get to it.

Cooking Light's Pumpkin Walnut Focaccia with Gruyere

Ingredients

3/4 cup warm water (100° to 110°)
1/3 cup packed brown sugar
1 package dry yeast (about 2 1/4 teaspoons)
3 1/2 cups bread flour, divided (about 15 3/4 ounces)
3 tablespoons butter, melted
1 cup canned pumpkin
1 teaspoon salt
1/4 teaspoon ground nutmeg
3/4 cup (3 ounces) grated Gruyère cheese, divided
Cooking spray
1 teaspoon cornmeal
1/3 cup coarsely chopped walnuts


Mix water, sugar, and yeast in a large bowl; let stand 5 minutes.
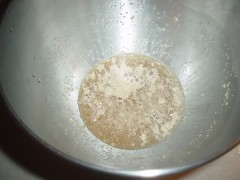

Look at it bubble up ! (Yeast excites me. Don't judge.)


Lightly spoon flour into dry measuring cups; level with a knife. Add 1 cup flour and butter to yeast mixture; stir just until combined.
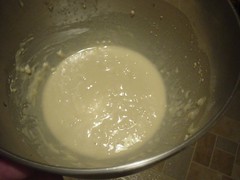


Cover and let rise in a warm place (85°), free from drafts, 30 minutes. ( I turn the oven on to 150 and then shut it off, crack the door for 30 seconds and voila - warm place free from drafts!)

Take this opportunity to get all your other ingredients ready.
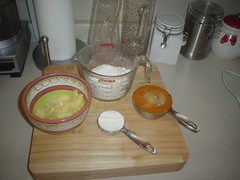


Add pumpkin, salt, and nutmeg to flour mixture; stir until well combined. Add 2 1/4 cups flour and half of cheese; stir until a soft dough forms.
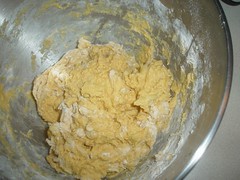


Turn dough out onto a floured surface and knead until smooth. It will at first be super sticky and this part seems like it lasts forever but just when you think you can't take anymore BOOM you have smooth elastic heaven that doesn't stick to anything. Just be sure and sprinkle some flour on the dough and surface while you're kneading. The recipe said you would only need 1/4 a cup for this, but I ended up using over a cup. I consulted my dad, a break making pro, and he assured me use however much flour you need to keep it from becoming to sticky to knead..just add 1 tablespoon at a time or so.

Place dough in a large bowl coated with cooking spray or veggie oil, turning to coat top to prevent it from drying out. Cover and let rise in a warm place (85°), free from drafts (use that oven trick again!) 1 hour or until doubled in size. (Press two fingers into dough. If indentation remains, dough has risen enough.) Punch dough down; cover and let rest 5 minutes. Divide dough in half; shape each half into an 8-inch circle. Place dough circles on a baking sheet sprinkled with cornmeal. Sprinkle remaining cheese and nuts evenly over dough circles; press lightly to adhere. Lightly coat dough circles with cooking spray; cover and let rise 20 minutes (dough will not double in size).


It's nice that it makes two loaves because it makes a fabulous gift! Just ask my mom (to whom I gave one on Saturday).

Preheat oven to 400°.

Uncover dough; bake at 400° for 30 minutes or until loaves are browned on the bottom and cheese melts (I would use some aluminum foil to prevent the cheese from browning up like mine did, even though it was still delicious!!). Cool on a wire rack.
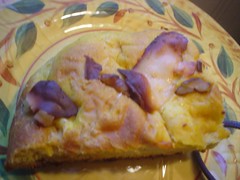


Look at that piece of awesomeness! A delightful orange hued bread filled with the smoky taste of Gruyere, the creamy hint of sweetness of pumpkin and crunchy delicious walnuts.

True love, in loaf form.

Wednesday, September 12, 2007

The Mac & Cheese to End All Mac & Cheese

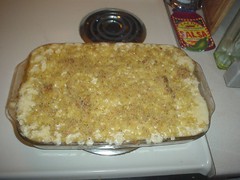
Last year, a few of my coworkers went to Smith and Wollensky for Restaurant Week and came back raving, not about the steak or the wine selection (both of which S&W is famed for) but about their Truffled Macaroni and Cheese. Since then, I have heard several raves about it and so this week, when t he whether turned gray and rainy and cold and the idea of a nice hot bowl of home made mac & cheese sounded so good, I decided to track down the recipe and give it a whirl.
I never denied that I have LOTS of time on my hands. And if you want to attempt this monster of a macaroni and cheese dish, you too will need a lot of time. Give yourself at least two to two and a half hours from the first shallot you chop to the moment you take the delicious cheesy perfection from the oven.

I of course had to tweak this recipe a bit because truffles and truffle oil? Not so easy to find. I actually did find truffle oil at a nearby gourmet shop but at $49.99 for the bottle I had to pass. So this is more or less the Smith and Wollensky Mac and Cheese dish without the truffleness.

Now, this is not a recipe for people on a diet. This is a recipe for people who are pretty much on the opposite of a diet. It contains no less than ONE bottle of white wine, 7.5 cups of various cream and almost a few sticks of butter not to mention several handfuls of cheese. Of course something that unhealthy is going to taste HEAVENLY and since we all try to eat healthy most of the time I think we should all get to splurge once in a while!!

So let’s get to it! You will need:

2 cups shallots, chopped
1/2 cup garlic chopped
4 cups white wine
4 cups heavy cream
3.5 cups half and half
2 tsp. black pepper
3 small cubes chicken bouillon (I used 1 extra large one)
1 cup parmesan cheese, grated
1 cup jalapeno jack cheese, grated
1.5 cheddar cheese, grated
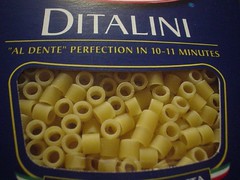
1.5 lbs. ditalini
1/4 cup flour
3/4 cup butter
TOPPING:
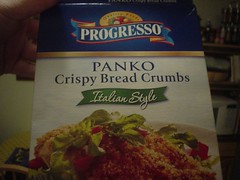
1 cup Japanese bread crumbs (panko)
1/4 cup butter
Salt & Pepper (to taste)

A few notes before we get started.

I love the texture of Panko and the seasoning in Italian style bread crumbs so I was PSYCHED to find this


And I had planned on just subbing in macaroni for the ditalini since I couldn't find it but when I finally did I ended up being psyched. The texture and size is perfecto! It is my new fave Macaroni & Cheese pasta. Well, I guess that makes it Ditalini and Cheese.


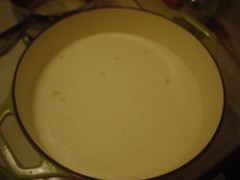
Get your chopped scallions and garlic together and sweat them in 1/2 cup butter in a large sauce pan or dutch oven until translucent (about 10 minutes).


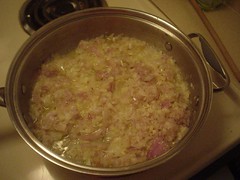
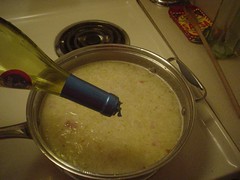
Add white wine and reduce by half (takes about half an hour).


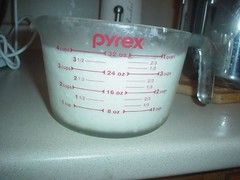
Don't be scared...but this is how much heavy cream is in this dish


EEK!

Once it is reduced add in that monster amount of heavy cream as well as the black pepper, chicken bouillon, and half & half. Bring to simmer (10-15 minutes) .

In a small saucepan, create a roux by melting the remaining 1/4 cup of the butter then mixing in flour. Whisk continually until light blond. Add roux to simmering mixture to thicken. Simmer an additional 10 minutes.


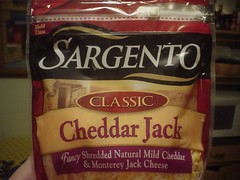
Add in all cheeses. Instead of the cheddar and jalapeno jack (which I could not find) I used a bag and a half of Sargento Shredded Cheddar Jack which worked smashingly.


When all cheeses are melted (about 10 minutes) blend mixture in covered blender or food processor (you will probably have to do two batches), then return to saucepan and bring back to a simmer (10-15 minutes). Add in pasta, adjust seasonings with salt and pepper, and allow to cool.

For the topping, combine about 1/4 a cup melted butter with a cup of Panko. The resulting bread crumb mixture should have a moist appearance and texture.

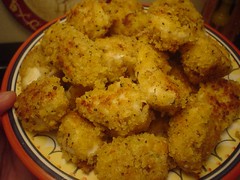
Side Note: To make it more of a meal, I had cooked up some breaded chicken strips using the rest of the Panko earlier in the night and I added it in at this point. However the dish is so substantial on it’s own you don’t even need to do that.


Place macaroni and cheese into a large casserole dish and evenly spread the topping over each dish and bake at 350 degrees for 25 minutes or until the topping is golden brown. Serve immediately.


Oh My God.


That is some cheesy heaven right there. This dish is definitely a departure from any other homemade mac and cheese I have made. The wine and garlic and shallots give more depth to the cheese and in my mind make it more "adult". Adam and I normally opt for healthier dishes so it was nice just to not think about that for a night. He LOVED the dish and it's a good thing since it makes about 20 servings!! I brought the leftovers in to work for my coworkers to snack on since as delectable as it is, I fear for my arterial flow if this magnificence was to stay within my reach for more than 12 hours.

This is an ideal dish for a pot luck or for a dinner party - a classy/modern take on homey favorites is always appreciated and you could always be daring and prepare it with the truffles (if you are interested in that, email me and I will send you the original recipe) OR add in some chopped up prosciutto.

Either way, it's divine.

Monday, November 27, 2006

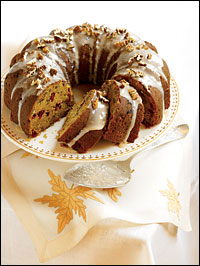
At Thanksgiving this year, you probably saw the usual suspects as far as pie is concerned: pumpkin, pecan, apple, maybe some sweet potato? I love those pies and the flavors in them always remind of me of the holiday season and being with family. But the thing is? I am a terrible pie baker. I never met a crust recipe I couldn't render inedible. Therefore I was intrigued when I heard Dorie Greenspan's recipe for an All In One Holiday Bundt Cake. This one bowl cake combines all the delicious tastes of the holiday pies we all love, without as much of the muss and fuss.


(photo from NPR.org)

Makes 12 servings

2 cups all-purpose flour
2 large eggs, at room temperature
2 teaspoons baking powder
1 teaspoon pure vanilla extract
1/2 teaspoon baking soda
1 1/4 cups canned unsweetened pumpkin puree
2 teaspoons ground cinnamon
1/4 teaspoon freshly grated nutmeg
1 large apple, peeled, cored and finely chopped
Pinch of salt
1 1/2 teaspoons grated fresh ginger (or 1 teaspoon ground ginger)
1 cup cranberries, halved or coarsely chopped
1 1/4 sticks (10 tablespoons) unsalted butter, at room temperature
1 cup pecans, coarsely chopped
1 cup sugar
Confectioners' sugar, for dusting
1/2 cup (packed) light brown sugar

GETTING READY: Center a rack in the oven and preheat the oven to 350 degrees F.

Butter a 9- to 10-inch (12-cup) Bundt pan. (If you've got a silicone Bundt pan, there's no need to butter it.) Don't place the pan on a baking sheet -- you want the oven's heat to circulate freely through the Bundt's inner tube.

Whisk together the flour, baking powder, baking soda, cinnamon, nutmeg, salt and ground ginger, if you're using it (not the grated ginger).

Working with a stand mixer, preferably fitted with a paddle attachment, or with a hand mixer in a large bowl, beat the butter and both sugars together at medium speed until light and fluffy. Add the eggs one at a time, and beat for 1 minute after each addition. Beat in the vanilla. Reduce the mixer speed to low and add the pumpkin, chopped apple and grated ginger, if you're using it -- don't be concerned if the mixture looks curdled. Still on low speed, add the dry ingredients, mixing only until they are incorporated. With a rubber spatula, stir in the cranberries and pecans. Scrape the batter into the pan and smooth the top with the rubber spatula.

Bake for 60 to 70 minutes, or until a thin knife inserted into the center of the cake comes out clean. Transfer the cake to a rack and cool for 10 minutes before unmolding, then cool to room temperature on the rack.

Just before bringing the cake to the table, dust it with confectioners' sugar.

Friday, October 06, 2006

It has been a long time, I know.

FAR too long.

I am working on a revamp of this site, and to be honest I haven't coooked or baked anything new and blog-worthy in a while.

Until last night.

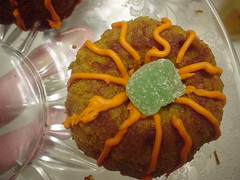
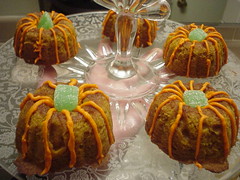
I give to you: PUMPKIN CUPCAKES SHAPED LIKE ACTUAL PUMPKINS!

Now, I have been in the market for a baking pan that will allow me to make pumpkin shaped cupcakes. I found this beauty at Williams Sonoma


And while it is perfect, it's also $32. And it's not something you can use year round which I would like to be able to do with a pan if I am paying over $30 for it. So onward to my failsafe, Crate and Barrel where I found this fluted silicone muffin pan.


While not exactly pumpkin shaped, you can imagine that an inverted mini bundt could look like a pumpkin. Plus it is made of silicone which is fun, and at $12.95 you can't beat the price.

I ususally use a carrot cake mix + pureed pumpkin concoction when I am making pumpkin cupcake, but I found this fabulous Martha recipe yesterday and it looked easy enough so I went with that.


Pumpkin Cupcakes (via Martha Stewart Living)

Makes 18

2 cups all-purpose flour
1 teaspoon baking soda
1 teaspoon baking powder
1 teaspoon coarse salt
1 teaspoon ground cinnamon
1 teaspoon ground ginger
1/4 teaspoon freshly grated nutmeg
1/4 teaspoon ground allspice
1 cup packed light-brown sugar
1 cup granulated sugar
1 cup (2 sticks) unsalted butter, melted and cooled
4 large eggs, lightly beaten
1 can pumpkin purée (15 ounces)

1. Preheat oven to 350°. Line cupcake pans with paper liners; set aside. In a medium bowl, whisk together flour, baking soda, baking powder, salt, cinnamon, ginger, nutmeg, and allspice; set aside.

2. In a large bowl, whisk together, brown sugar, granulated sugar, butter, and eggs. Add dry ingredients, and whisk until smooth. Whisk in pumpkin purée.

3. Divide batter evenly among liners, filling each about halfway. Bake until tops spring back when touched, and a cake tester inserted in the center comes out clean, 20 to 25 minutes, rotating pans once if needed. Transfer to a wire rack; let cool completely.
***********

I ended up using my new silicone pan, plus 2 mini cupcake pans and one regular cupcake size pan, so it makes a good amount of cupcake.

I found that the mini cupcakes took 10 minutes, the regular sized cupcakes took about 18 and the ones in the silicone pan took the full 20-25 minutes. Once they were cooled I inverted then, and using orange frosting with a little pipette attached I drew orange lines down the sids of the mini bundt-pumpkins (bundtkins) and used cut up green candied lime as the stems.

Et Voila!


Pumpkin Cupcakes shaped like ACTUAL PUMPKINS


I'm really into it, in case you can't tell.

Thursday, September 14, 2006

One of my favorite things about fall is caramel apples. The mere sight of them makes me happy, not to mention the lovely way the sweet caramel compliments the apple-y tartness.

And of course we know that today is Friday which means...


So it was perfectly logical that I began hunting around for a caramel apple cupcake recipe.

There are aquite a few out there, from the gourmet to the practically already made when you buy them. I opted for a happy medium. I was inspired by a recipe for these treats from the goddess of all things cupcake, Chockylit. Since I knew I would be making these at night, after work AND after having made dinner, I didn't want anything TOO involved so I devised a plan to cheat. I went to the supermarket in search of spice cake mix and when I couldn't find one I decided to use a carrot cake mix. Instead of using water in the cake recipe, I used apple cider. And instead of making my own caramel, I melted down some store bought caramels with a little milk and used that. I did keep Chockylit's recipe for the cream cheese filling because it was easy enough, and also PERFECT.

So here we have it.

Caramel Apple Cupcakes.

1 package carrot cake mix
apple cider

2 cups peeled and chopped Granny Smith apples.

Preheat oven to 325

Prepare cake mix as follows but subsitute an equal amount of apple cider for the water. Fold in choppped apples and blend. Pour batter into LARGE 6-muffin tin that has been sprayed with cooking spray (or use large baking cups).

Bake for 15-20 minutes, or until toothpick inserted into middle comes out clean.

While cupcakes are cooling prepare cream cheese filling

1/4 c cream cheese
1/4 c butter
2 cups confectioner's sugar
1 tsp vanilla


Make sure cream cheese and butter are at room temperature and cream them in mixer until smooth. Slowly add sugar and vanilla and blend.

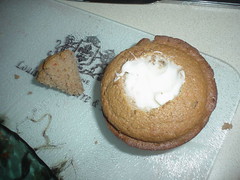
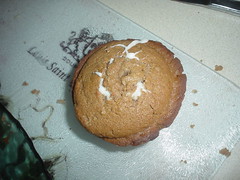
When the cupcakes are completely cooled (I put them in the freezer for a few minutesto speed things along), you want to remove the center section by cutting in a little circle on the top of the cupcake. Remove a small cone shaped piece and spoon some of the cream cheese frosting in until almost full


And replace top when finished.


When all cupcakes are done, set aside and begin on caramel topping. It's important that you have the cupcakes completely ready to be frosted when you take the caramel off the stove because it will harden up within minutes, making it really difficult to spread.

Caramel Topping

20 caramels (I used Brachs, they even come with popsicle sticks this time of year for making actual caramel apples. )
2 1/2 tbsp milk.


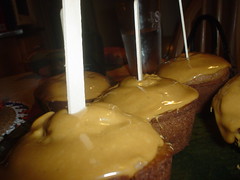
Combine and cook over low heat until melted and smooth. At this point it is important to work quickly, and to ensure that the cupcakes don't become too drippy. Using a butter knife, spread some of the caramel over the top of each cupcake, coating evenly, and place in fridge or freezer immediately. When you are done, you may remove them from the freezer or fridge and they won't drip since the caramel will have stiffened.


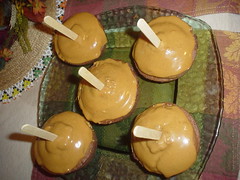
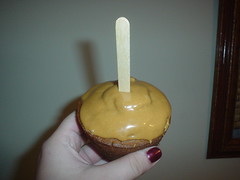
Place popsicle stick in the middle and voila!


Caramel Apple Cupcakes!


Aren't they adorable?

A nice autumn cupcake.

The batter is enough to make six large cupcakes with enough left over to make 12 mini cupcakes. You can break that down other ways too, I am sure you could just make 12 medium sized cupcakes out of this batter too. I like the bigger ones because they hold up to the cutting of the middle better. I plan on wrapping up a few in celophane and tying it up with a festive ribbon to give out to my parents & brother when I see them this weekend.

Either way they are really cute, and REALLY delicious.

Monday, September 11, 2006

Yesterday Adam and I had big plans of going apple picking with some friends. The plans ended up kind of falling apart because of a little something called the Patriots Game. Adam said we could still go by ourselves, but the more I thought about it the more I realized I was really just in it for the apples...not the actual picking. So when I was out doing my weekly food shopping, I picked up an array of fresh apples and decided to make some apple-y things for dinner. I ended up making an apple chutney to serve over ham steaks for dinner, and an apple-walnut bundt cake for dessert.


The chutney came out delicious, and I highly reccomend it for people who like pineapple on their ham since it is remeninscent of that taste.

The cake was super easy and delicious as well. Mine came out slightly overdone even though I cooked it for the right amount of time so I suggest start checking it after an hour.

Both recipes are from the Good Housekeeping Cookbook (which I highly reccomend!) and both are excellent ways to use fresh apples!

Apple-Onion Chutney

2 tbsp vegetable oil
1 medium onion, peeled and chopped
2 medium Golden Delicious apples, peeled and chopped
1 tsp finely chopped ginger
3/4 c apple cider
1 tbsp cider vinegar
1/4 tsp salt.

Heat oil in medium sace pan over medium heat.

Add onion and cook for 5 minutes. Add apple and ginger and cook for another 5 minutes. Add remaining ingredients and heat to boiling. Cover and reduce heat, simmer for 15 minutes.

Apple Walnut Bundt Cake

3 cup all-purpose flour
1-3/4 cup granulated sugar
1 tsp baking soda
1 tsp ground cinnamon
3/4 tsp salt
1/4 tsp ground nutmeg
1 cup vegetable oil
1/2 cup apple juice
2 tsp vanilla extract
3 large eggs
1 lb. golden delicious or granny smith apples
3 medium), peeled, cored, and coarsely chopped
1 cup walnuts (4 ounces), coarsely chopped
confectioners sugar


Preheat the oven to 350 degrees f.

Grease and flour 10-inch bundt pan. In large bowl, combine flour, granulated sugar, baking soda, cinnamon, salt, nutmeg, oil, apple juice, vanilla, and eggs. with mixer at low speed, beat
until well blended, frequently scraping bowl with rubber spatula.

Icrease speed to medium; beat 2 minutes, scraping bowl. with wooden spoon, stir in apples, and nuts. Spoon batter into prepared pan; spread evenly.

Bake until cake pulls away from side of pan and toothpick inserted in center comes out clean, about 1 hour 15 minutes. Cool in pan on wire rack 10 minutes. run tip of thin knife around edge of cake to loosen. Invert cake onto rack; cool completely. Dust with confectioners' sugar.

Wednesday, December 28, 2005

One of the best investments I have made in a looooong time was a subscription to Cooking Light magazine. It is chock full of recipes that are so delicious, easy to make, and health concious. Adam and I have both resolved to eat healthier in the new year, and luckily I have found that this does NOT mean we have to stop eating what we love, including dessert (I am a big dessert fan!).

For instance, I found this incredible dessert recipe in last month's issue that incorprates two things i love: cookies and frosting. And it still comes in at under 200 calories a serving.

(Also: if you hate nuts feel free to leave them out. I did, and they were still fantastic!)

Maple-Walnut Spice Cookies

Store these frosted cookies between layers of parchment paper or wax paper to keep them from sticking together. You can bake and freeze the cookies up to a month in advance; bring the cookies to room temperature before frosting them.

Cookies:
1 1/2 cups all-purpose flour (about 6 3/4 ounces)
1/2 teaspoon baking soda
1/2 teaspoon ground ginger
1/2 teaspoon ground cinnamon
1/4 teaspoon salt
1/8 teaspoon ground nutmeg
1/8 teaspoon ground cloves
3/4 cup packed dark brown sugar
1/4 cup butter, softened
2 tablespoons maple syrup
1 large egg

Frosting:
1 cup powdered sugar
2 tablespoons maple syrup
1 tablespoon fat-free milk
2 teaspoons butter, softened

Remaining ingredient:1/2 cup finely chopped walnuts, toasted

Preheat oven to 350°.

To prepare cookies, lightly spoon flour into dry measuring cups; level with a knife. Combine flour and next 6 ingredients (through cloves) in a medium bowl, stirring well with a whisk.

Place brown sugar and 1/4 cup butter in a large bowl; beat with a mixer at high speed until light and fluffy (about 4 minutes). Add 2 tablespoons syrup and egg; beat until well blended. Beating at low speed, gradually add flour mixture; beat just until combined.

Spoon batter evenly into 30 mounds (about 1 tablespoon) 2 inches apart on baking sheets. Bake at 350° for 14 minutes or until lightly browned. Cool on pans 5 minutes. Remove from pans; cool completely on wire racks.

To prepare frosting, combine powdered sugar, 2 tablespoons syrup, milk, and 2 teaspoons butter, stirring with a whisk until smooth. Spread frosting evenly over cooled cookies. Working quickly, sprinkle cookies with nuts. Yield: 30 cookies (serving size: 2 cookies)


NUTRITION PER SERVINGCALORIES 196(30% from fat); FAT 3.3g (sat 1.1g,mono 1g,poly 1.1g); PROTEIN 1.2g; CHOLESTEROL 12mg; CALCIUM 12mg; SODIUM 58mg; FIBER 0.3g; IRON 0.5mg; CARBOHYDRATE 16.3g

Monday, November 28, 2005

There is nothing I hate more than having to make a trip back to the grocery store because I forgot/didn't get enough of something. I hate hate hate it. In fact, I would just scrap whatever recipe plans I had rather than go back. So I tend to buy too much out of fear of buying too little.

Which is why I have an excess of uncooked/unused cranberries, gravy, almonds and sausage now that Thanksgiving has come and gone.

But you know the old adage: when life gives you lemons make lemonade? Well i figured when life gives you too many cranberries and almonds, make cranberry-almond cheesecake.

It took a but of finagling and substituting, but I nailed down a great recipe for the afore mentioned dessert. Adding the sour cream makes it a bit less dense and cheesy. And the almondy sweetness compliments the tart cranberry beautifully!

Cranberry-Almond Cheesecake

3 tbsp sugar
3/4 c crushed graham crackers
1/4 c crushed almonds
3 tbsp melted butter
Three 8 oz packages of cream cheese, at room temp
1 c sour cream
3/4 c sugar
2 tsp almond extract
2 tbsp flour
3 eggs
leftover cranberry relish/sauce.

Combine first 4 ingredients and press onto bottom of 8 inch springform pan (or something similar). Bake at 325 for 10 minutes.

Beat cream cheese with extract, flour and sugar until well blended. Add eggs one at a time and sour cream. Beat until creamy.

Pour into crusted pie pan and bake at 325 for 55 minutes.

Allow to cool in fridge for one hour, then spread cranberry sauce/relish on top. I put my sauce threw a sieve first to smooth it out and then heated it so it would spread more evenly.

And for all you nut-haters, you could also use vanilla extract instead, and omit the crushed almonds, adding an extra 1/4 cup of graham cracker crumbs in the crust.

Friday, November 18, 2005

While driving to work this morning and listening to NPR "Morning Edition" as usual, I heard an unusual "Cranberry Relish" recipe, recited by Martha Stewart, that at first utterly repulsed me. But the more I thought about it...the more I realized it wanted to try it out. I mean if Martha says it's good....i kind of have to think that it IS good.

So here we go

MAMA STAMBERG'S CRANBERRY RELISH


2 cups whole raw cranberries, washed

1 small onion

3/4 cup sour cream

1/2 cup sugar

2 T. horseradish from a jar (red is a bit milder than white)

1-Grind the raw berries and onion together. (I use an old-fashioned meat grinder. I'm sure there's a setting on the food processor that will give you a chunky grind -- NOT a puree)

2-Add everything else and mix.

3-Put in a plastic container and freeze.

Early Thanksgiving morning, move it from freezer to refrigerator compartment to thaw. (It should still have some little icy slivers left.)

The relish will be thick, creamy, and shocking pink (OK, Pepto Bismol pink). Tangy taste that cuts through and perks up the turkey and gravy. Also good on next-day turkey sandwiches. And with roast beef!

Makes 1-1/2 pints.

(it's so easy a stuffed monkey can make it. want proof? click here)

Friday, November 04, 2005

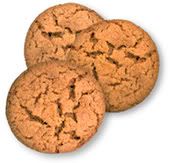
there are a few scents that always remind me of fall: roasting pumpkin seeds, freshly baked apple pie, newly raked leaves, and these amaaaaaazing cookies. i got the recipe from the New Good Housekeeping Cookbook which my mom gave me when I moved into my new place (along with a well-intentioned copy of "Cooking for Dummies"!). They are really easy to make, and you probably have most, if not all of the ingredients in your kitchen right now.

Two pieces of advice: even though it says the pepper is optional you should definitely use it. it adds a spicy quality that really meshes well with the ginger. and i like to sprinkle a little extra sugar on the dough balls after i put them on the baking sheet, before they go into the oven, to give them an extra sparkly, crackly appearance.


JUMBO GINGERSNAPS


2 cups all-purpose flour
2 teaspoons ground ginger
1 teaspoon baking soda
1/2 teaspoon ground cinnamon
1/2 teaspoon salt
1/4 teaspoon ground black pepper (optional) (use it)
3/4 cup vegetable shortening
1/2 cup sugar
1 large egg
1/2 cup dark molasses
2 tablespoons sugar

Preheat oven to 350 degrees.

In medium bowl, combine flour, ginger, baking soda, cinnamon, salt, and pepper (if using (USE)).

In large bowl, with mixer at medium speed, beat shortening and 1/2 cup sugar until light and fluffy.

Beat in egg until blended; beat in molasses.

Reduce speed to low; beat in flour mixture just until blended.

Place remaining 2 tablespoons sugar on waxed paper.

Roll 1/4 cup dough into ball; roll in sugar to coat evenly.
Repeat for 10 balls.

Place balls 3 inches apart on ungreased cookie sheet.
(If you want smaller cookies, roll dough by slightly rounded tablespoons and place 2 inches apart on two ungreased cookie sheets).

Bake until set, about 15 minutes for large cookies, or 9 to 11 minutes for smaller cookies.

Cookies will be very soft and may appear moist in cracks.

Cool 1 minute on cookie sheets on wire racks.

Transfer to wire racks to cool completely.